
How can we help you manage your gym?
Explore step-by-step guides on attendance tracking, WhatsApp membership reminders, staff roles, billing, and system settings.
How to Add New Gym Members in ApexGymOS
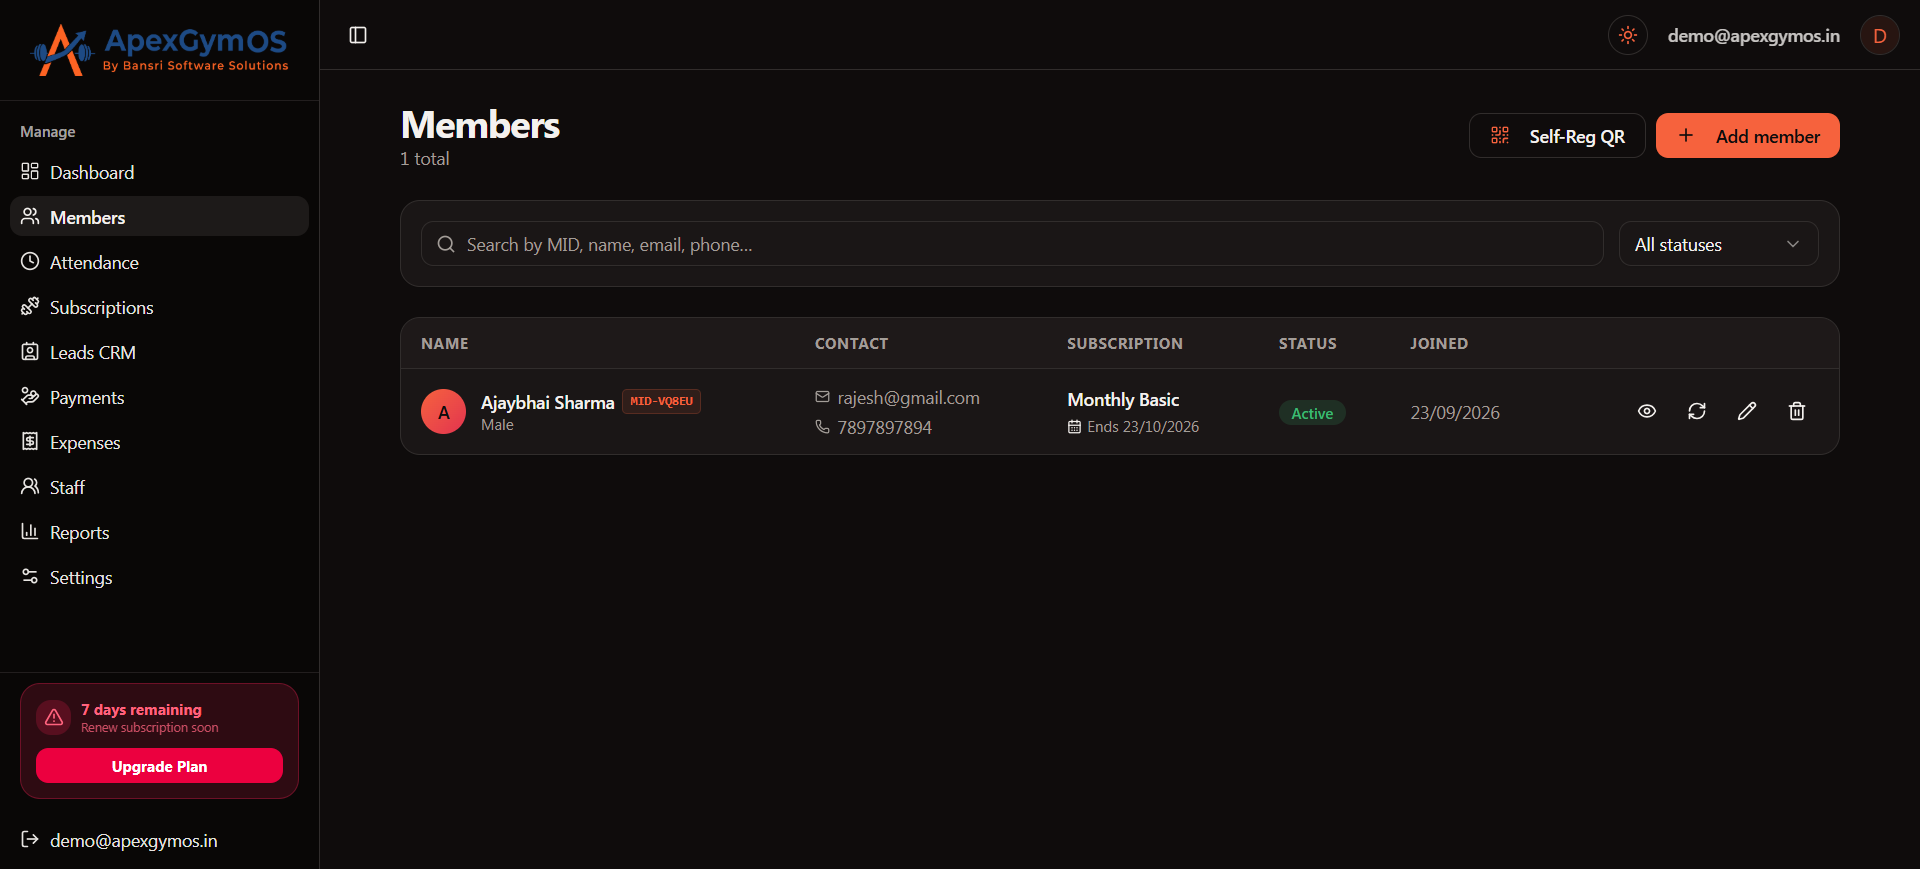
Add a New Member Manually
To add a member manually:
- Open Members from the sidebar.
- Click the green + Add Member button.
- Complete the member registration form.
- Review the membership and payment information.
- Click Save & Register Member.
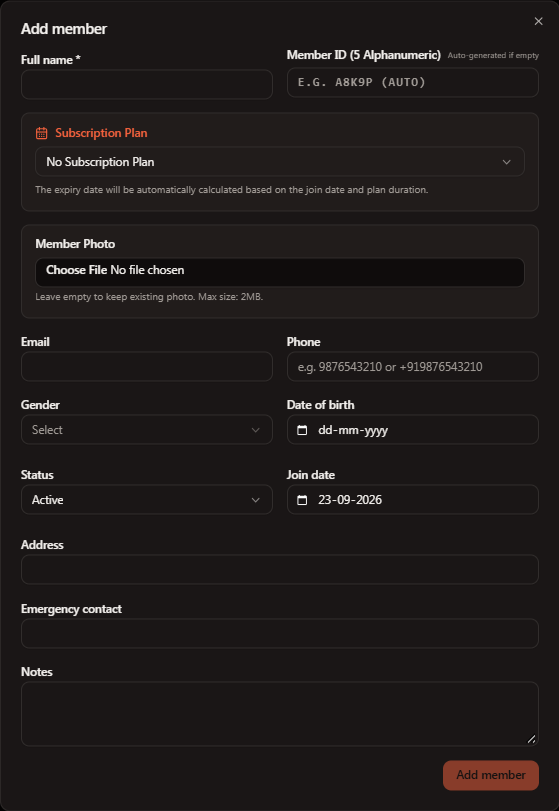
Member Information
Fill in the required member details:
| Field | What to Enter | Example |
|---|---|---|
| Full Name | Member's complete name | Rahul Sharma |
| Mobile Number | Member's 10-digit mobile number | 9876543210 |
| Email Address | Member's email address | [email protected] |
| Gender | Select the appropriate gender | Male |
| Date of Birth | Member's date of birth | 1995-08-15 |
| Select Package | Select the membership plan | 3 Months Pro |
| Joining Date | Membership start date | 2026-09-22 |
| Paid Amount | Amount collected from the member | ₹4,500 |
| Payment Mode | Select the payment method | UPI |
The Expiry Date can be automatically calculated based on the selected membership package and joining date.
After entering all information, click Save & Register Member.
Review the Member in the Members Directory
After registration, the member will appear in the Members list.
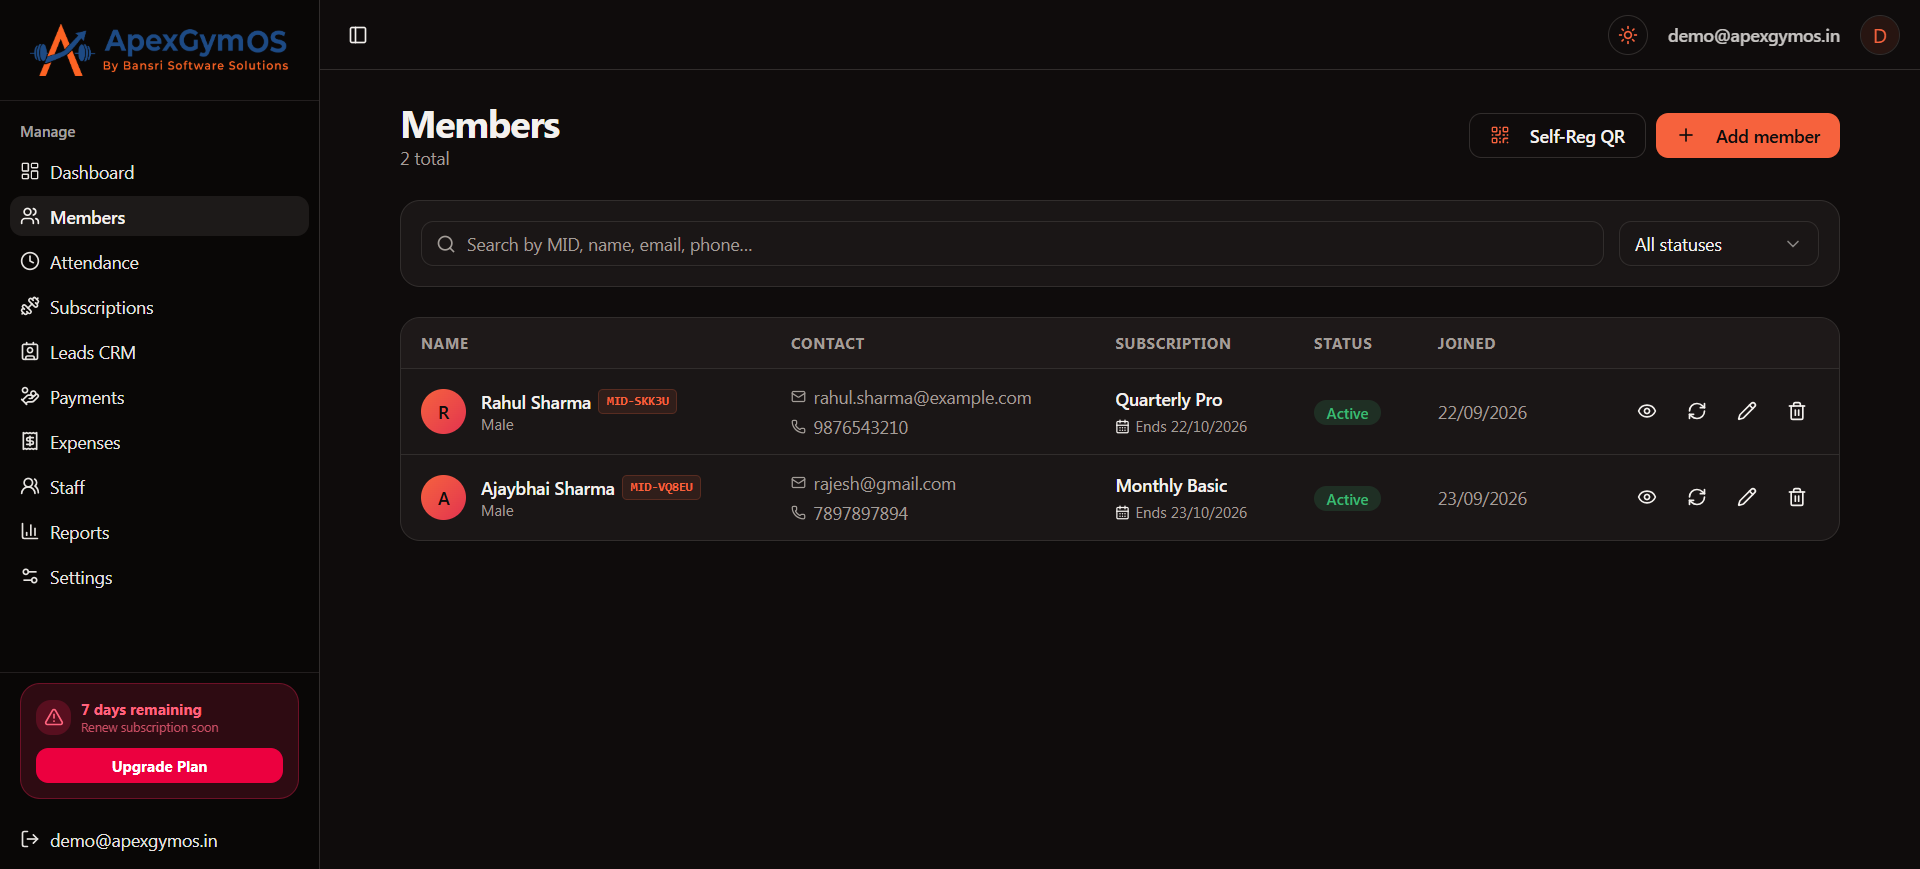
The directory displays important information such as:
- Member Photo
- Name
- Mobile Number
- Membership Plan
- Joining Date
- Expiry Date
- Membership Status
You can search for a member by Name or Mobile Number.
You can also filter members by:
- Active
- Expiring Soon
- Expired
View a Member's Profile
To see complete information about a member, click the member's row or select View Profile.
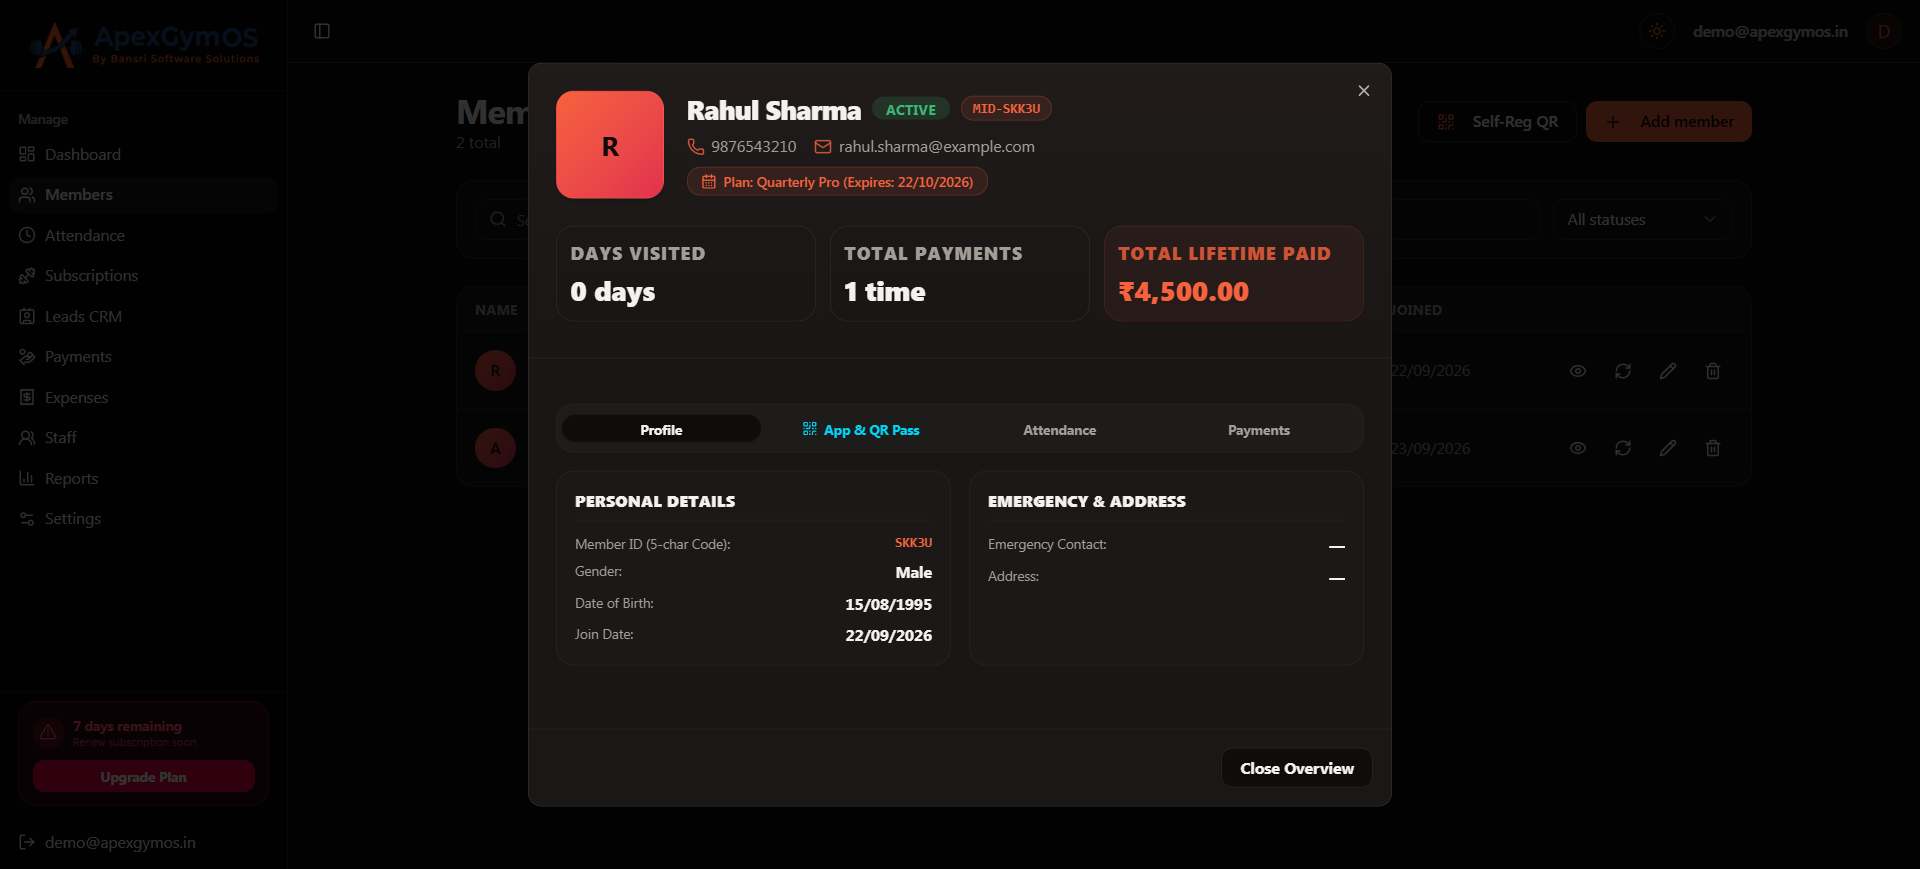
The member profile provides access to:
- Personal details
- Emergency contact
- Date of birth
- Address
- Current membership status
- Plan name
- Membership start date
- Membership expiry date
- Days remaining
- Payment history
- Attendance history
The profile can also display the credentials configured for the member's Apex Member Mobile App.
Add Members Through Self-Registration
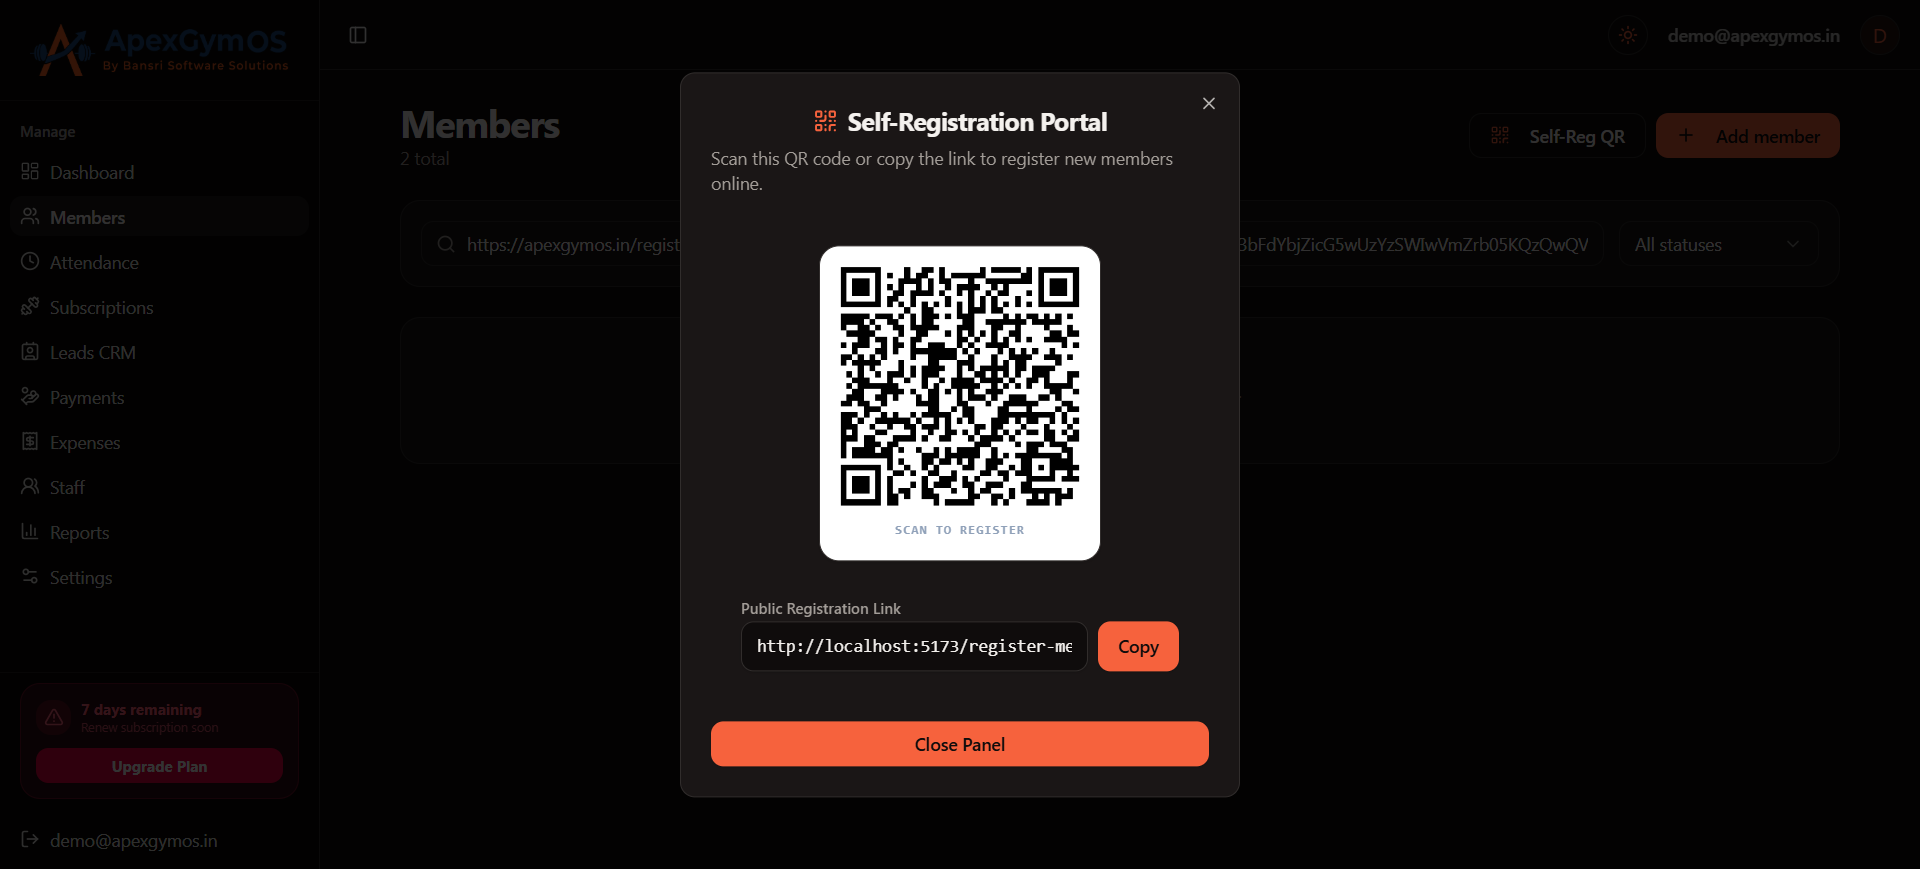
To access the self-registration QR code:
- Open the Members section.
- Click Self-Reg QR in the top action bar.
- The system displays your gym's unique Self-Registration QR Code and Public Registration Link.
Share the Registration QR Code or Link
You can:
- Print the QR code and display it at your reception.
- Share the registration link through WhatsApp.
- Share the registration link through your Instagram bio.
- Share the link through other online channels.
The prospective member can scan the QR code or open the registration link from their phone.
What Members Enter During Self-Registration
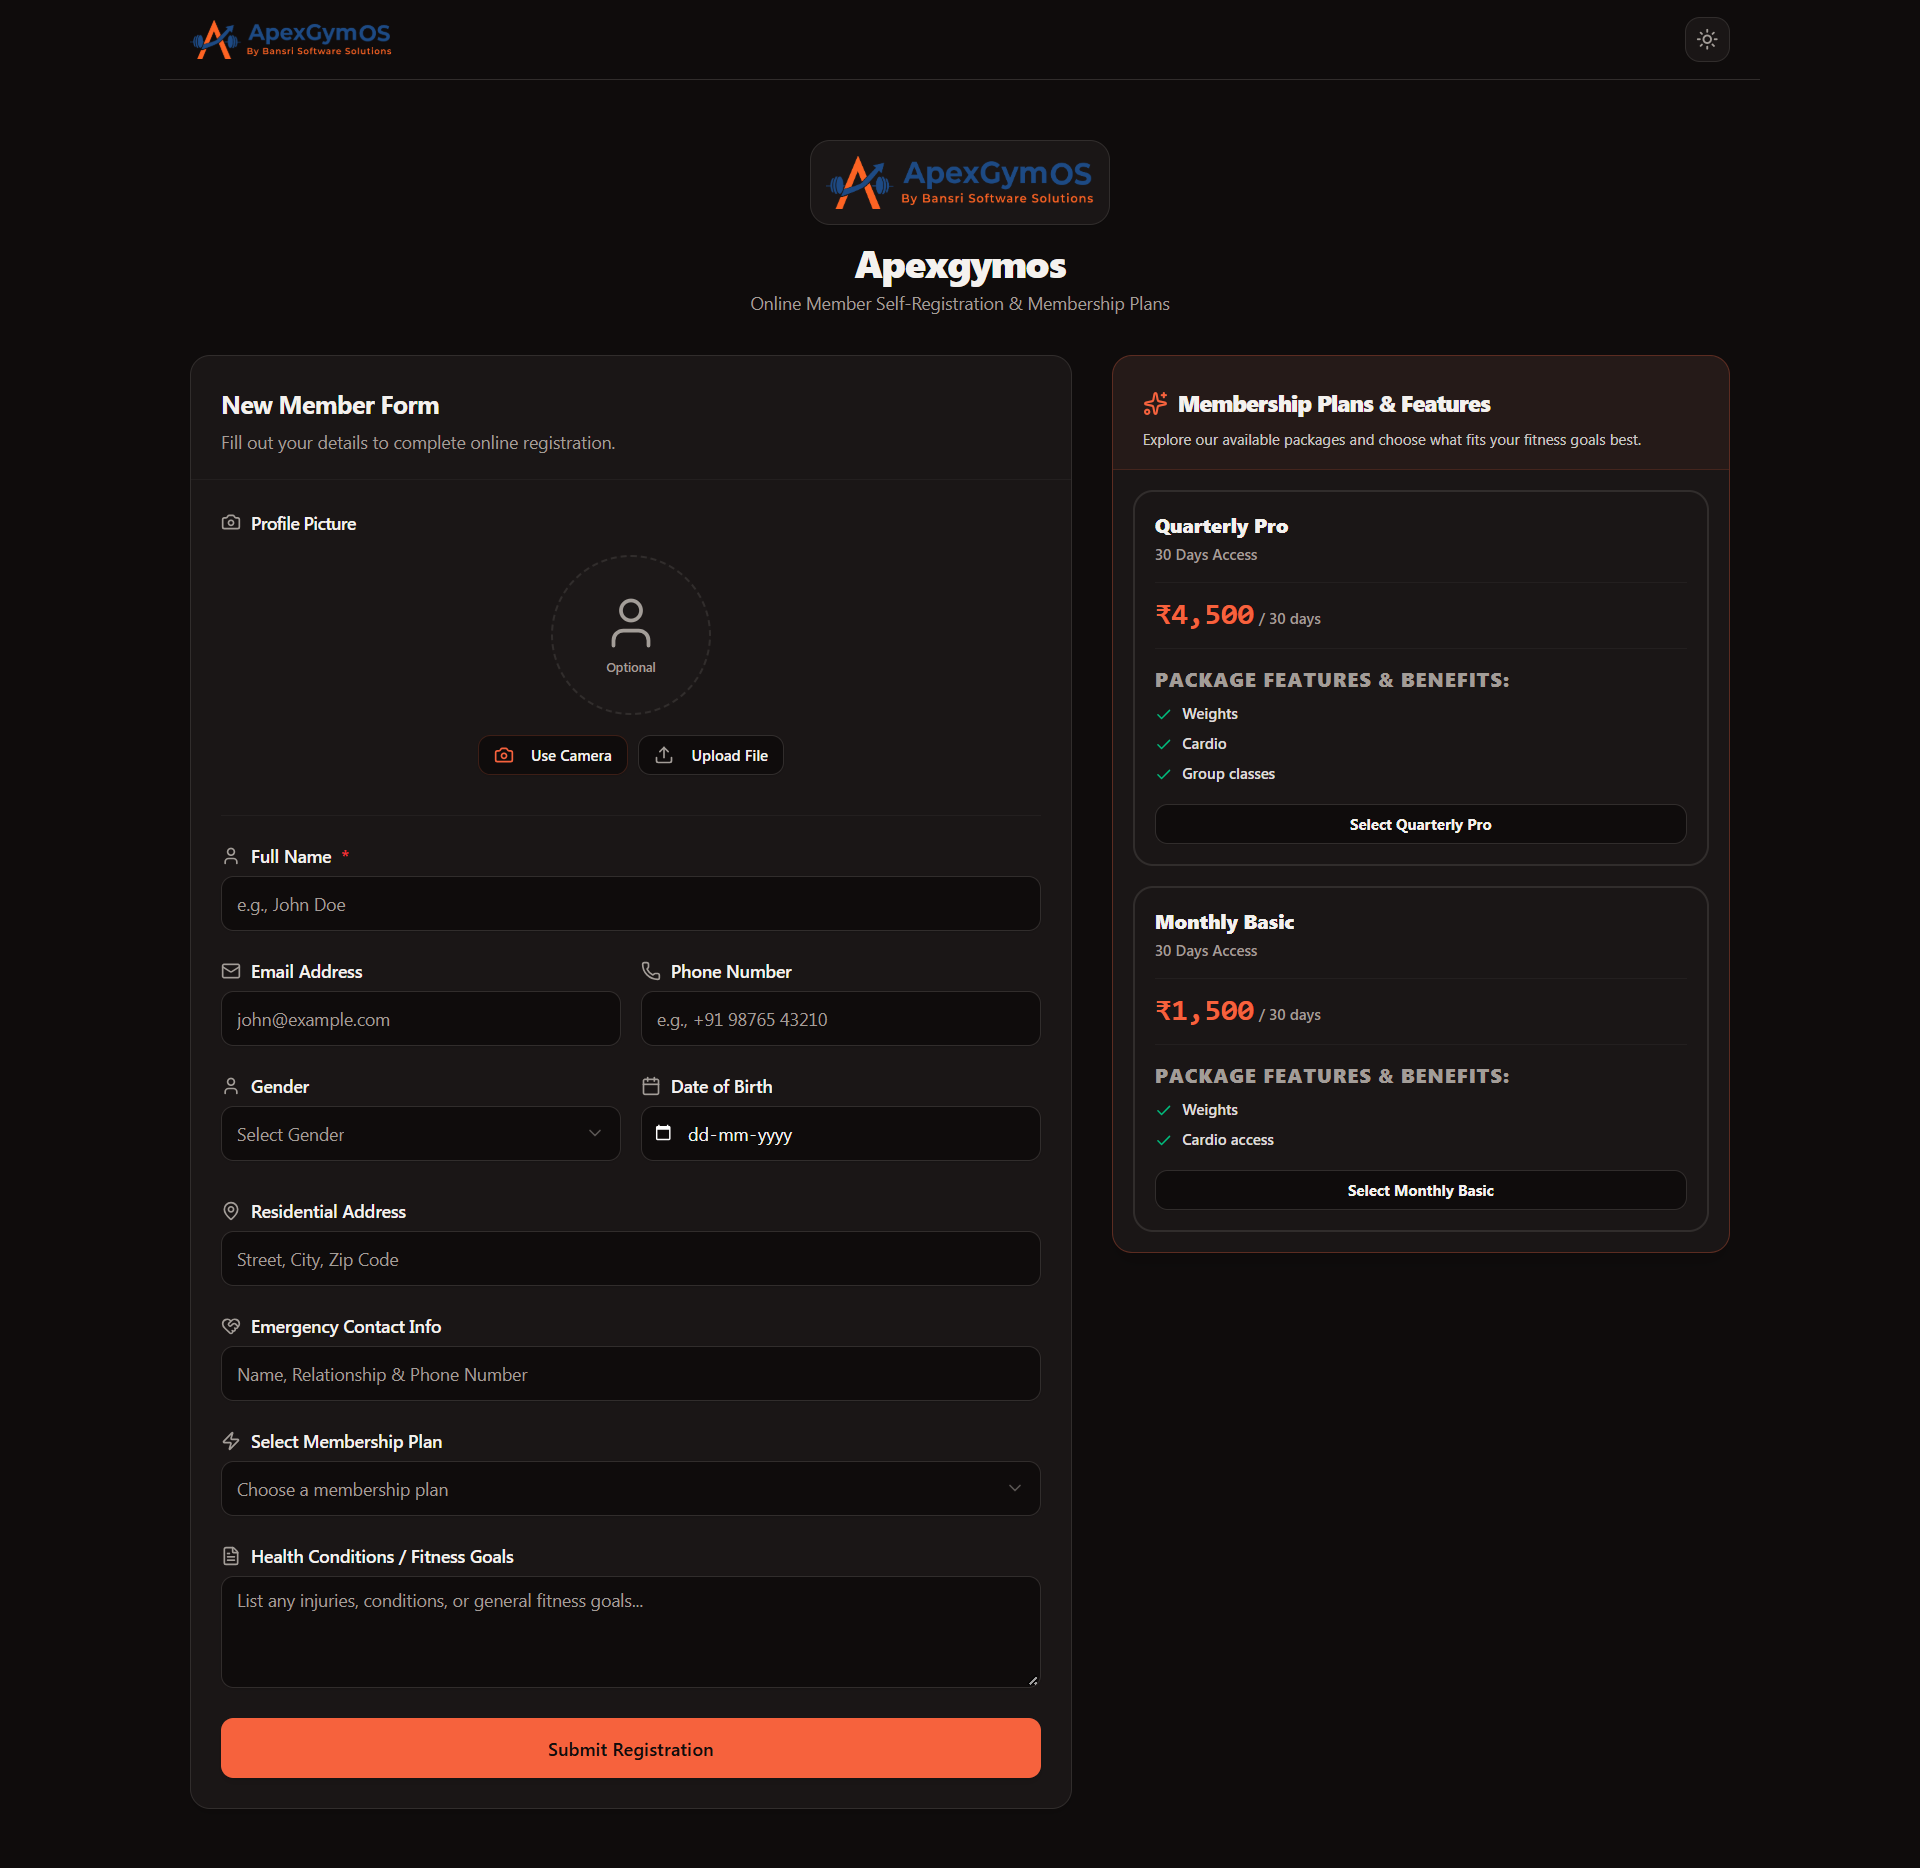
The member can provide their own:
- Name
- Phone Number
- Email Address
- Preferred Package
- Photo
After submitting the form, the registration appears in your Members List as a pending/new registration for staff approval and payment collection.
Manual Registration vs Self-Registration
| Method | Best Used For |
|---|---|
| Manual Registration | Reception staff registering a member directly at the gym |
| Self-Registration QR | Allowing prospective members to enter their own details |
| Public Registration Link | Sharing the registration form through WhatsApp, Instagram, or other channels |
Before You Register a Member
Make sure your membership plans have already been created. This allows you to select the appropriate package while registering the member.
For information about creating plans and pricing, see:
Creating Membership Plans
Once the member is registered, you can manage their attendance, payments, membership renewal, and profile information from ApexGymOS.
Was this guide helpful?
Help us improve ApexGymOS documentation.