
How can we help you manage your gym?
Explore step-by-step guides on attendance tracking, WhatsApp membership reminders, staff roles, billing, and system settings.
Getting Started with ApexGymOS
Welcome to ApexGymOS — a complete gym management system designed to help you manage your gym's daily operations from one place.
This guide will help you get started with your ApexGymOS account, understand the dashboard, and complete the basic setup before you begin managing members, payments, attendance, and staff.
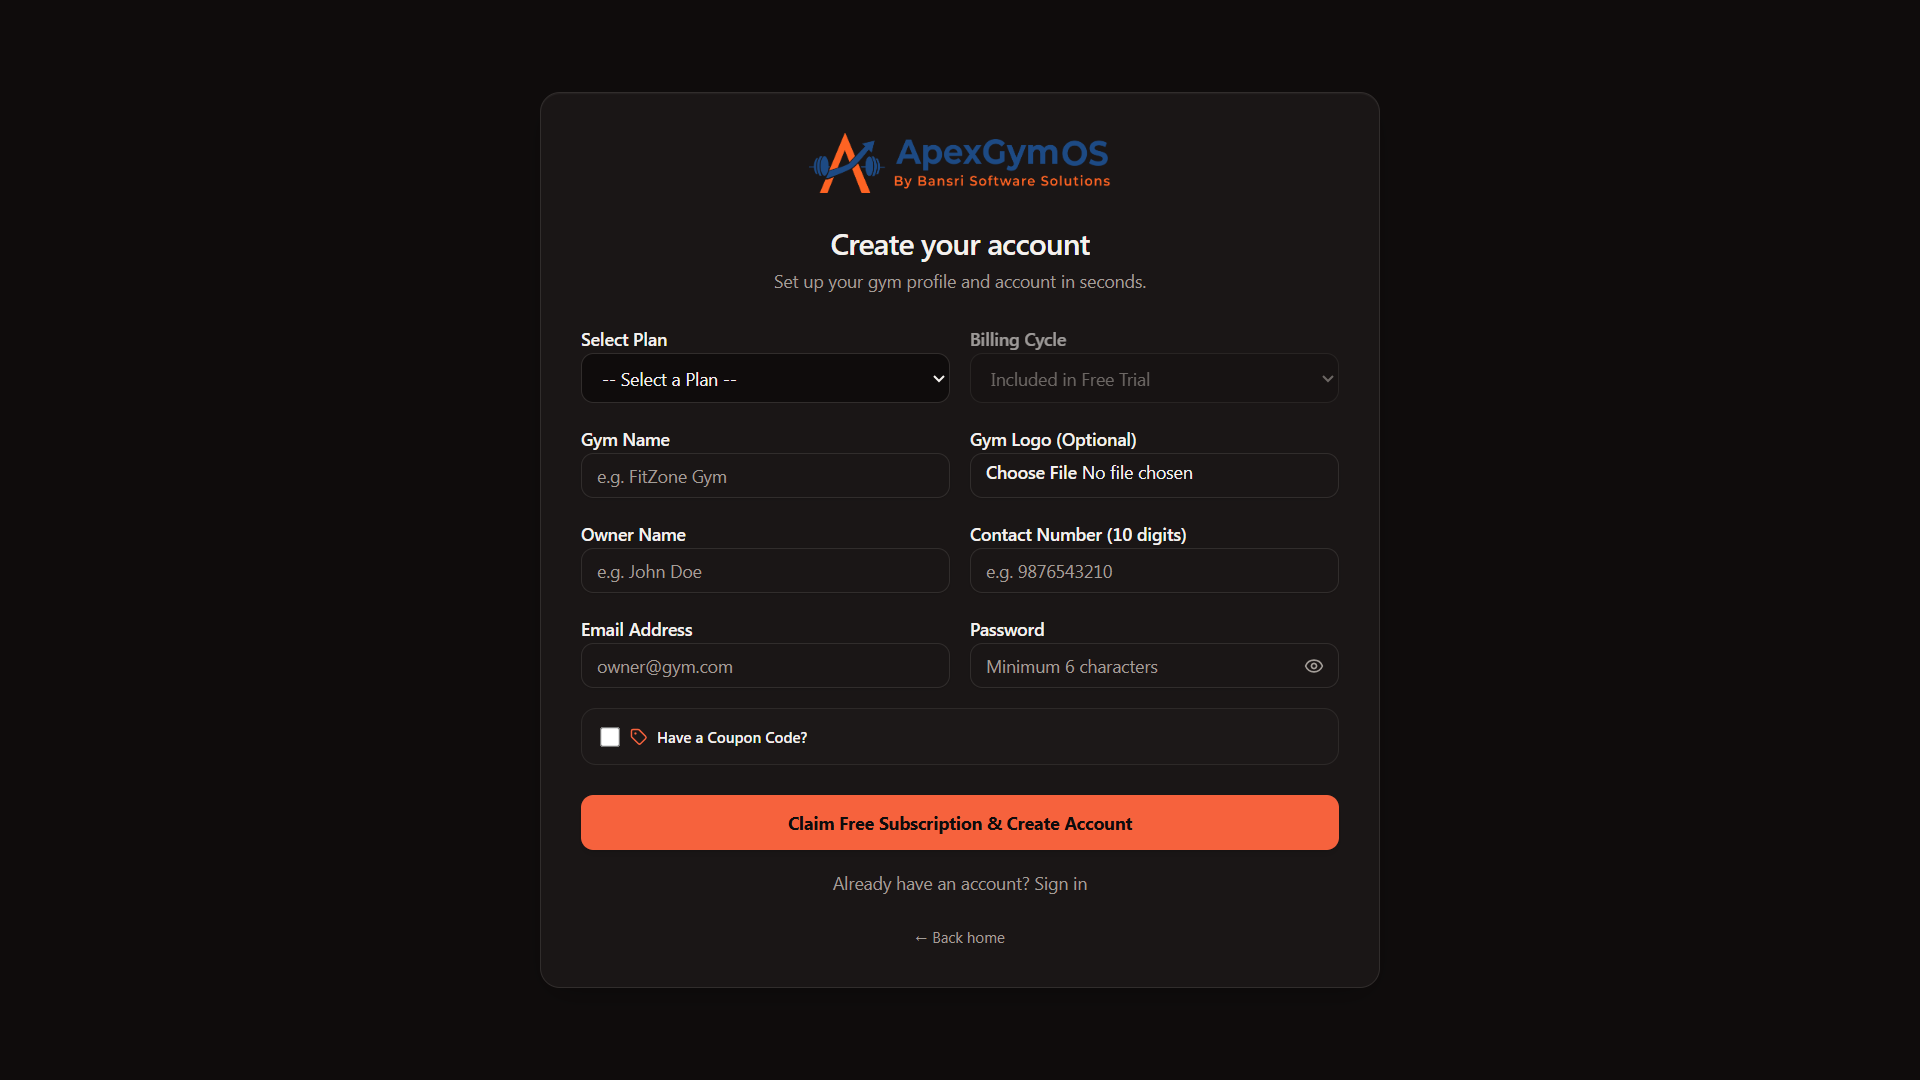
1. Create Your ApexGymOS Account
To start using ApexGymOS, first create your gym account.
Enter the following information on the registration page:
- Gym Name — Your gym or fitness business name.
- Owner Name — Full name of the gym owner.
- Email Address — Business email used for login and system notifications.
- Mobile Number — Your primary contact number.
- Password — A secure password for your account.
If you have a promotional or coupon code, enter it in the Coupon Code field and click Apply Coupon.
Once all details are entered, click Create Account.
2. Log In to Your Gym Account
After registration, open the ApexGymOS Login page.
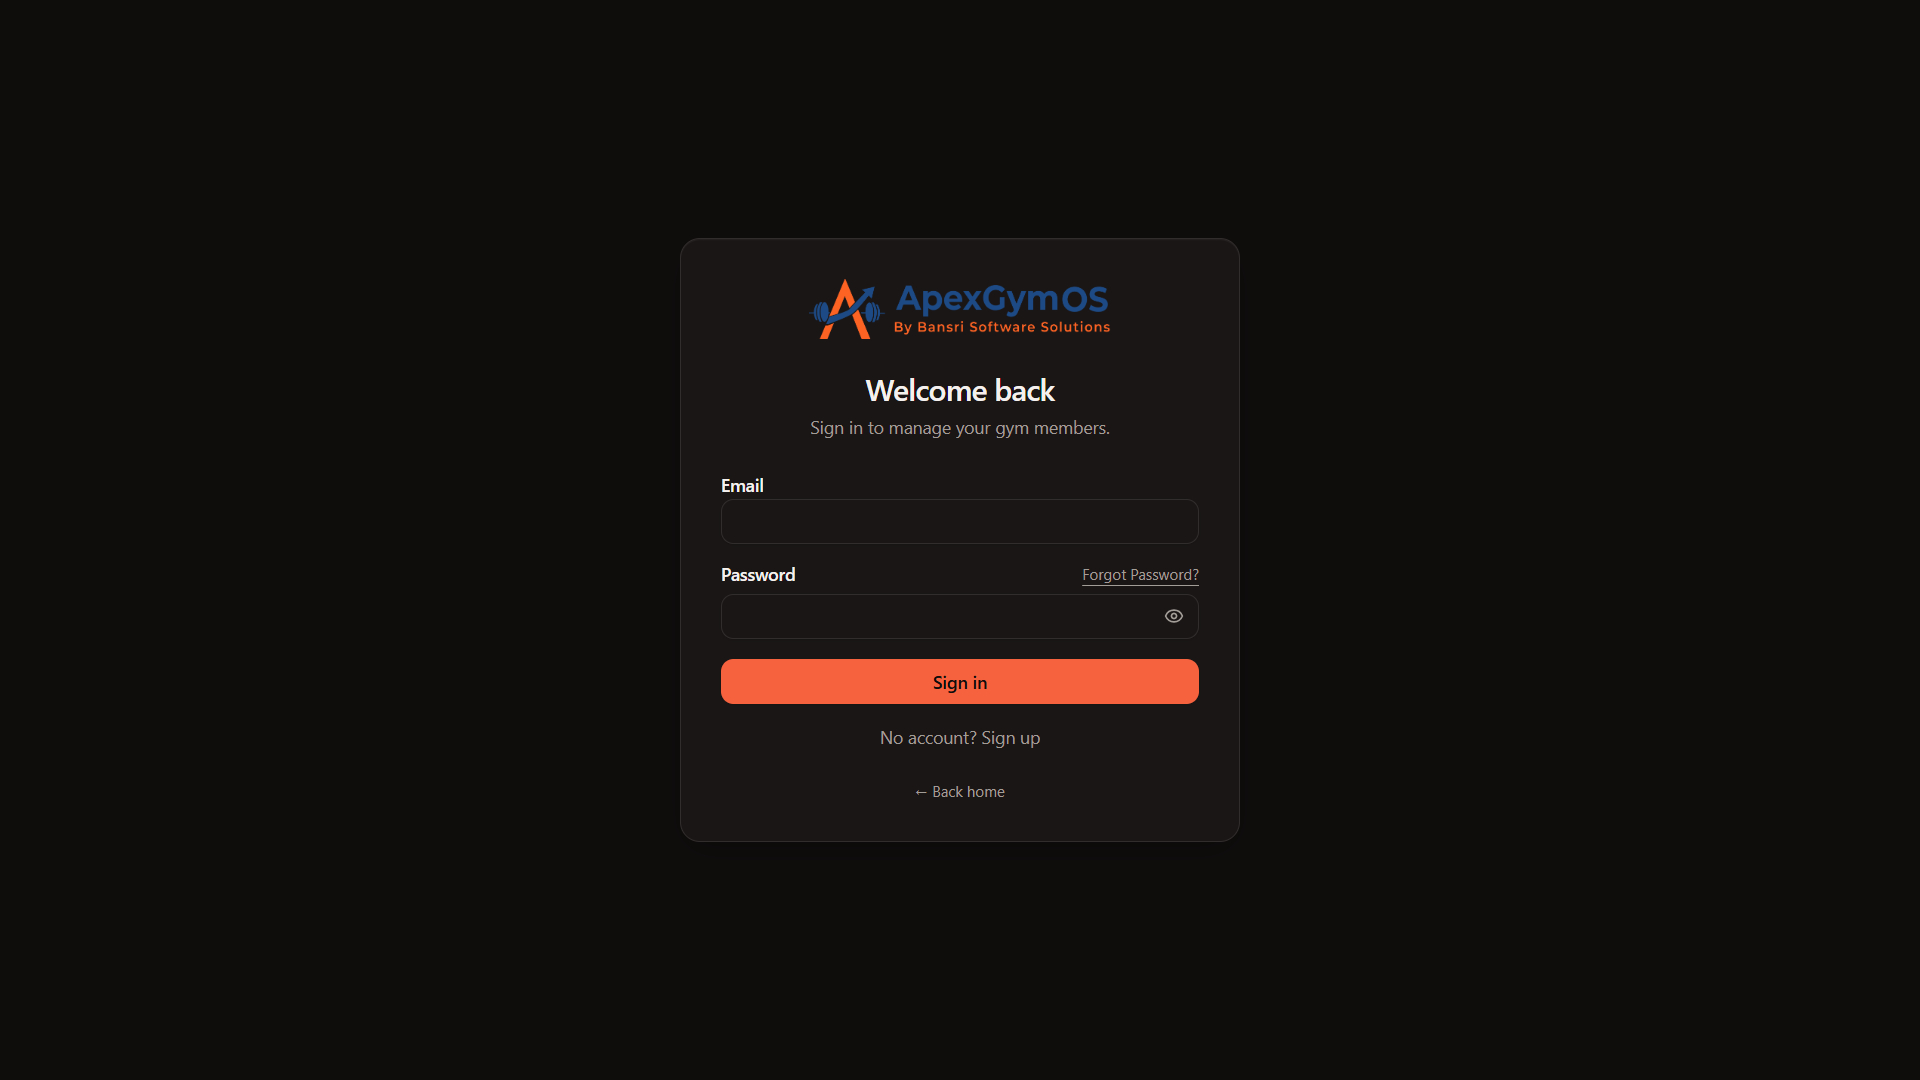
Enter your registered Email Address and Password, then click Sign In.
After successful login, ApexGymOS will take you to your gym dashboard.
3. Understand the Dashboard
The dashboard gives you a quick overview of your gym's current activity.
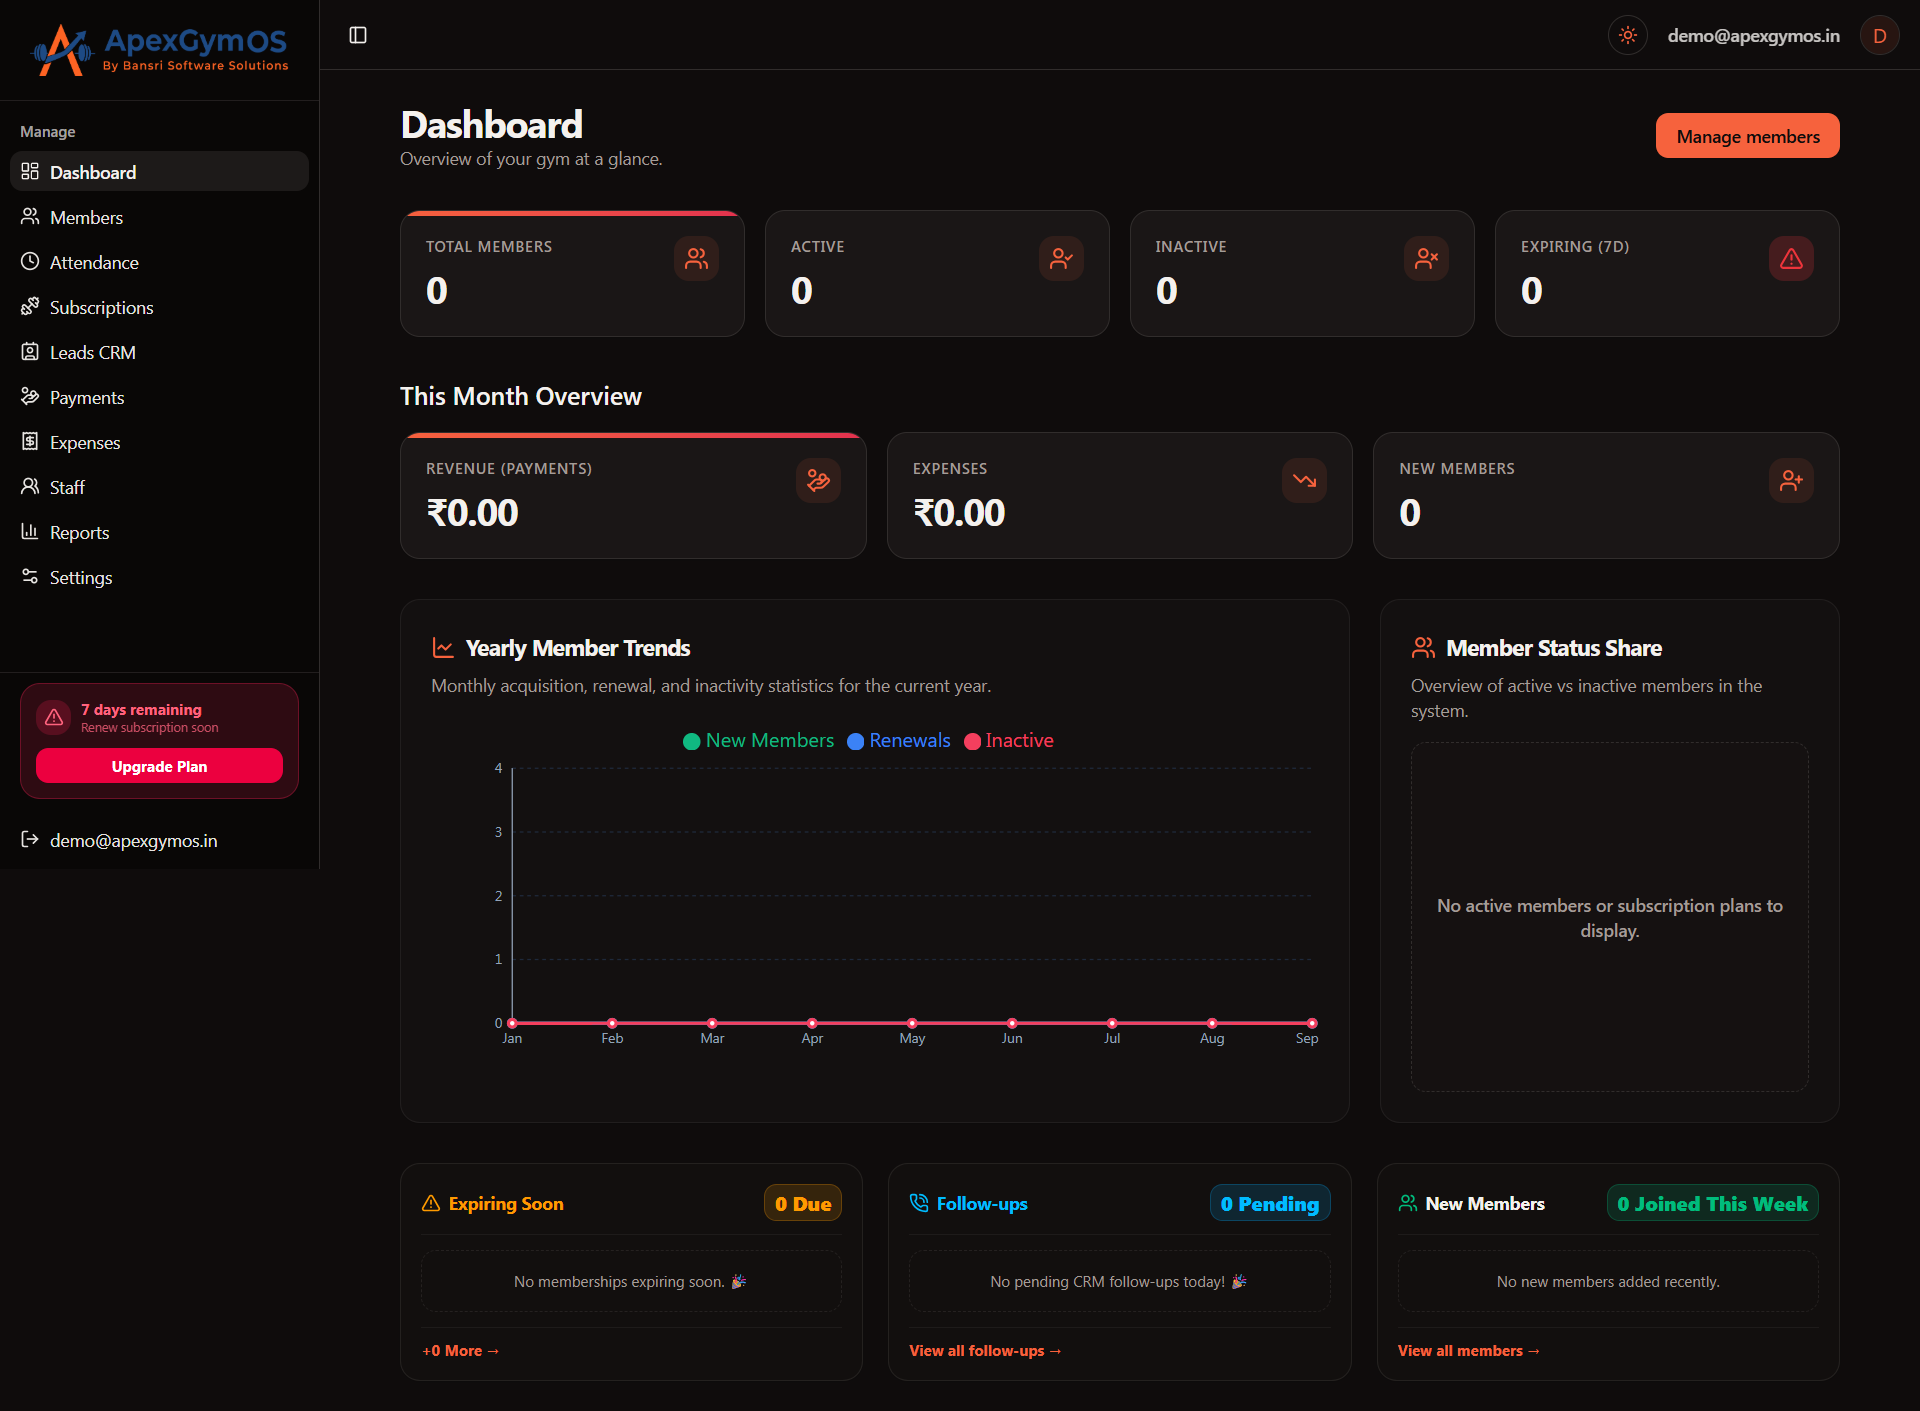
The main dashboard includes:
- Total Members — Total number of registered members.
- Active Members — Members whose membership has not expired.
- Monthly Revenue — Revenue collected during the current month.
- Today's Attendance — Number of members who checked in today.
- Revenue vs Expense — Overview of revenue and expense trends.
- Peak Attendance — Helps identify the busiest attendance periods.
- Expiring Members — Members whose memberships are expiring within the next 7 days.
You can also use the dashboard's quick actions to perform common tasks:
- Add Member
- Log Attendance
- Record Payment
4. Complete Your Basic Gym Setup
Before starting daily operations, configure your gym information from Settings.
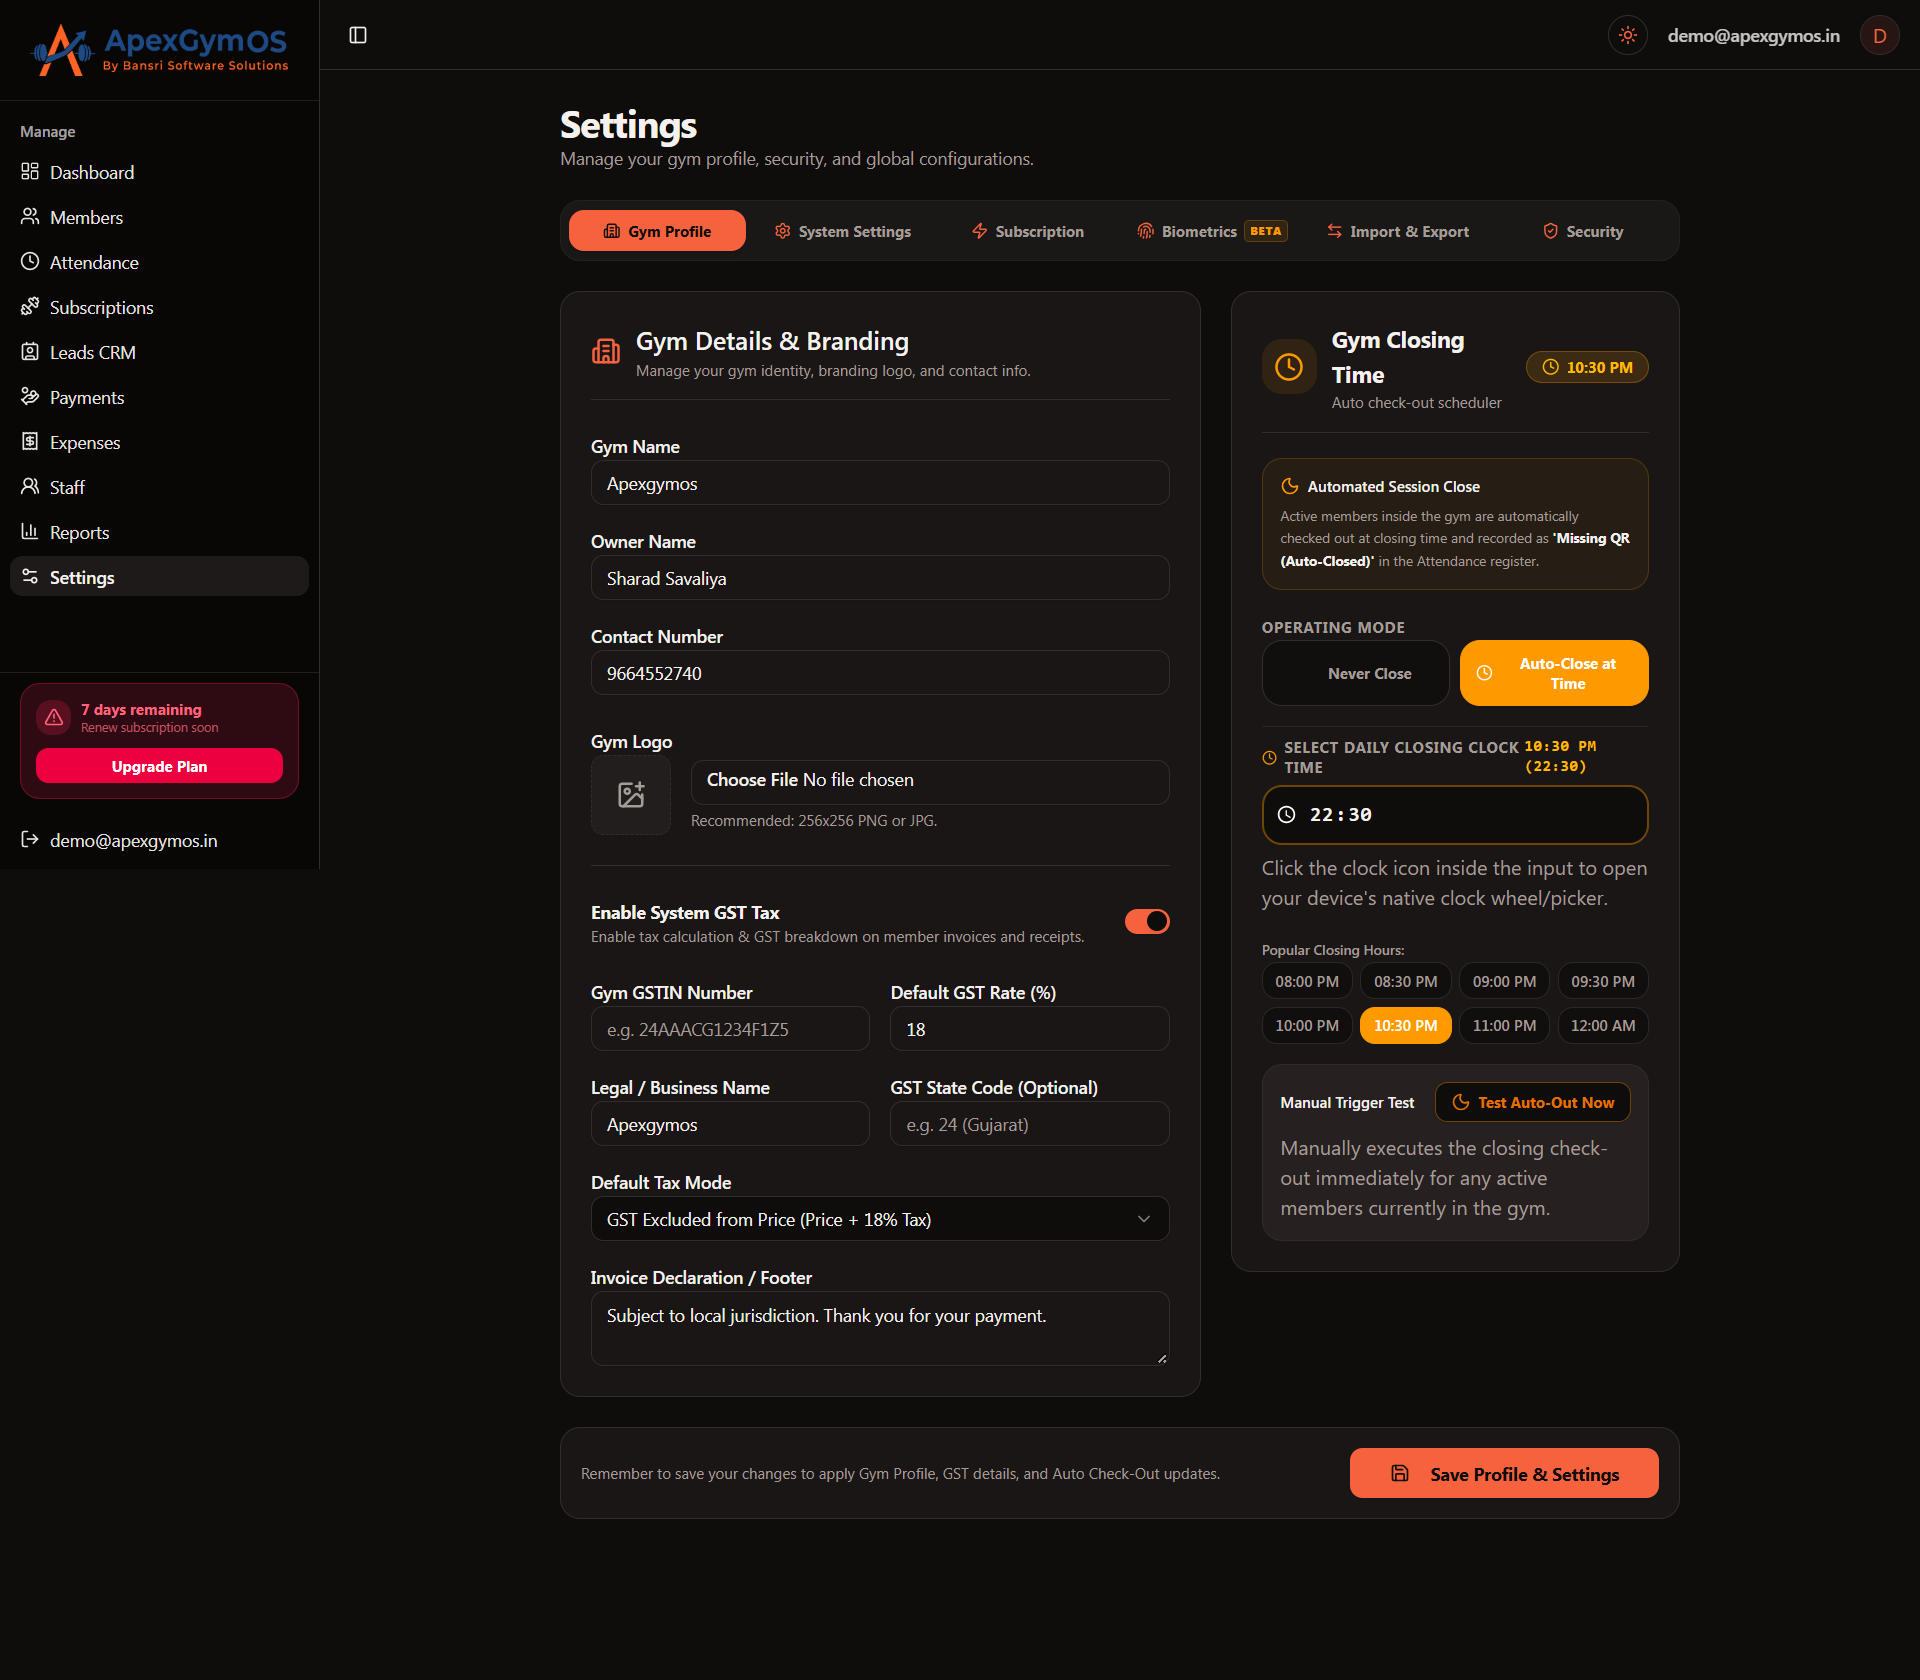
You can configure your:
- Gym Name
- Gym Logo
- Contact Number
- GST Configration (optional)
- Gym Close Time
You can also configure your operating hours, subscription defaults, security settings, and other system options.
5. Add Your Membership Plans
Before adding members, create the membership plans that your gym offers.
Create your plans with the appropriate duration and pricing before registering members.
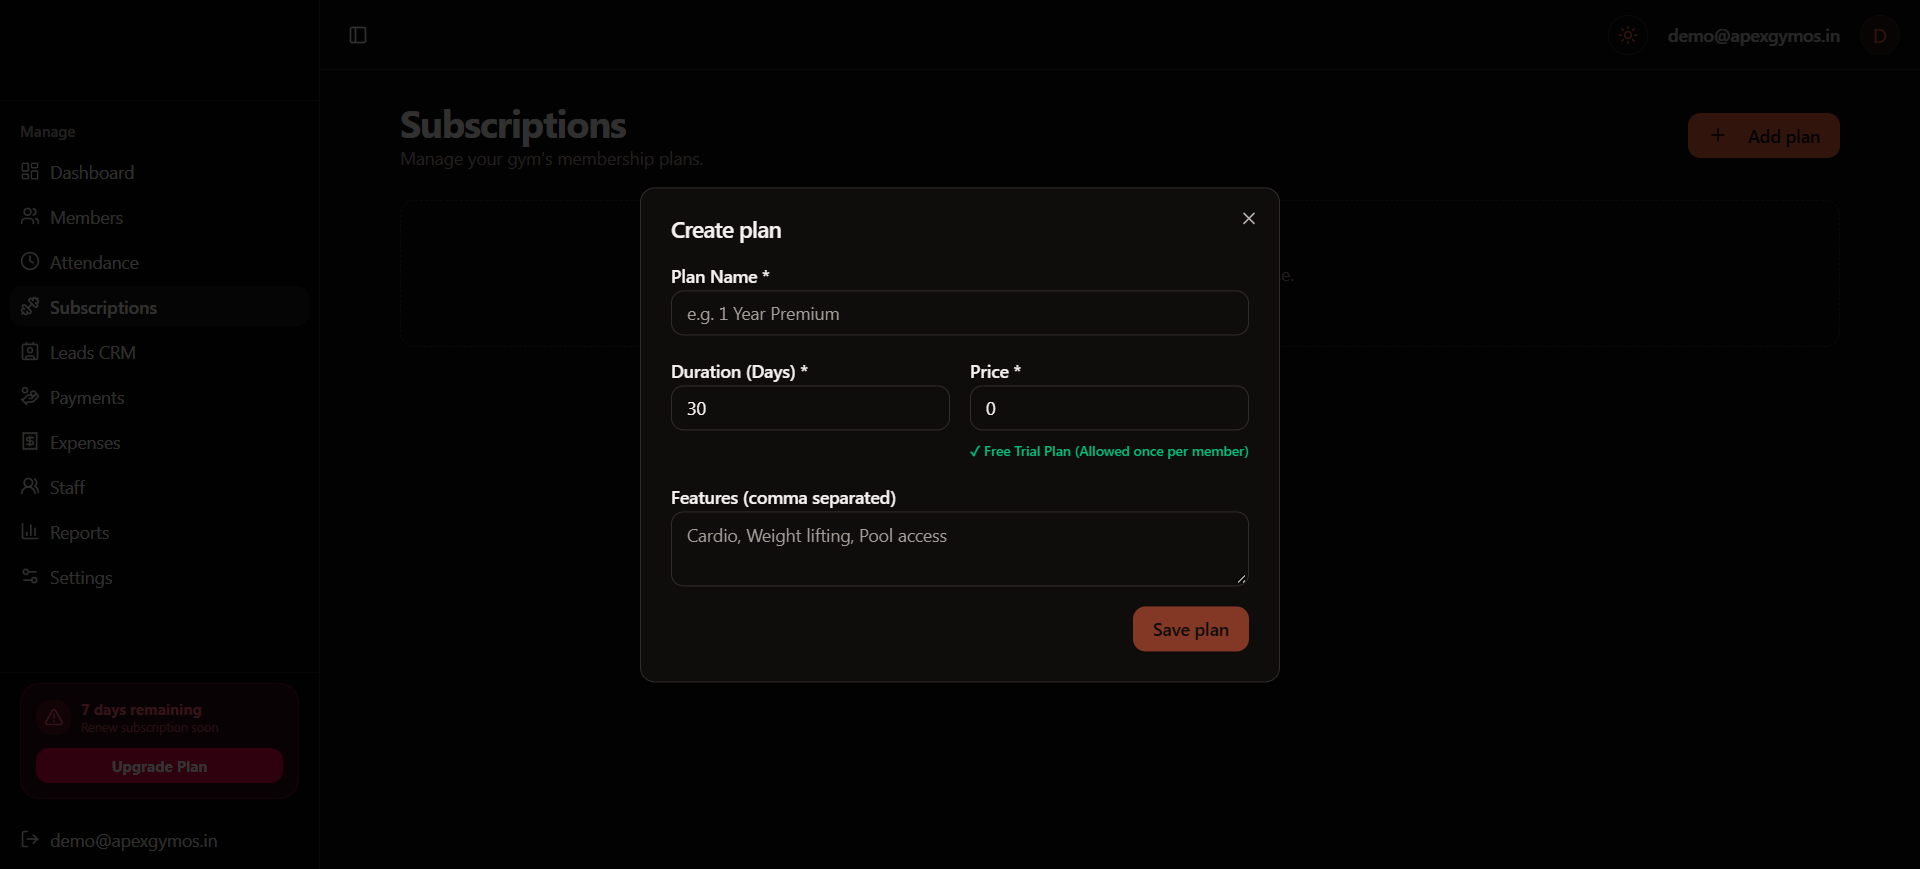
For each membership plan, define:
- Plan Name — Name of the membership plan.
- Duration (Days) — Number of days the membership remains active.
- Price — Membership price. For a Trial Plan, set the price to 0.
- Features — Add all features included in the plan, separated by commas.
Trial Plan Rule
If you create a Trial Plan, keep the price at 0. A member can use the free trial only once. The same member cannot take the same free trial again after using it once.
For detailed instructions, see:
Creating Membership Plans
6. Add Your First Member
Once your basic gym setup is complete, you can start adding members.
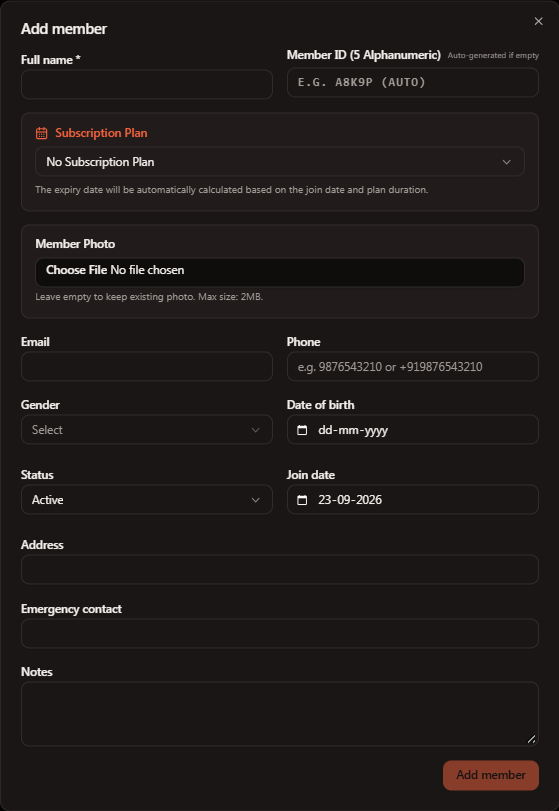
The member registration process allows you to enter information such as:
- Full Name
- Mobile Number
- Email Address
- Gender
- Date of Birth
- Membership Package
- Joining Date
- Expiry Date
- Paid Amount
- Payment Mode
For the complete member registration workflow, see:
Adding Your First Member
7. Set Up Attendance
ApexGymOS supports different attendance methods, including manual check-in, QR-based attendance, and biometric attendance.
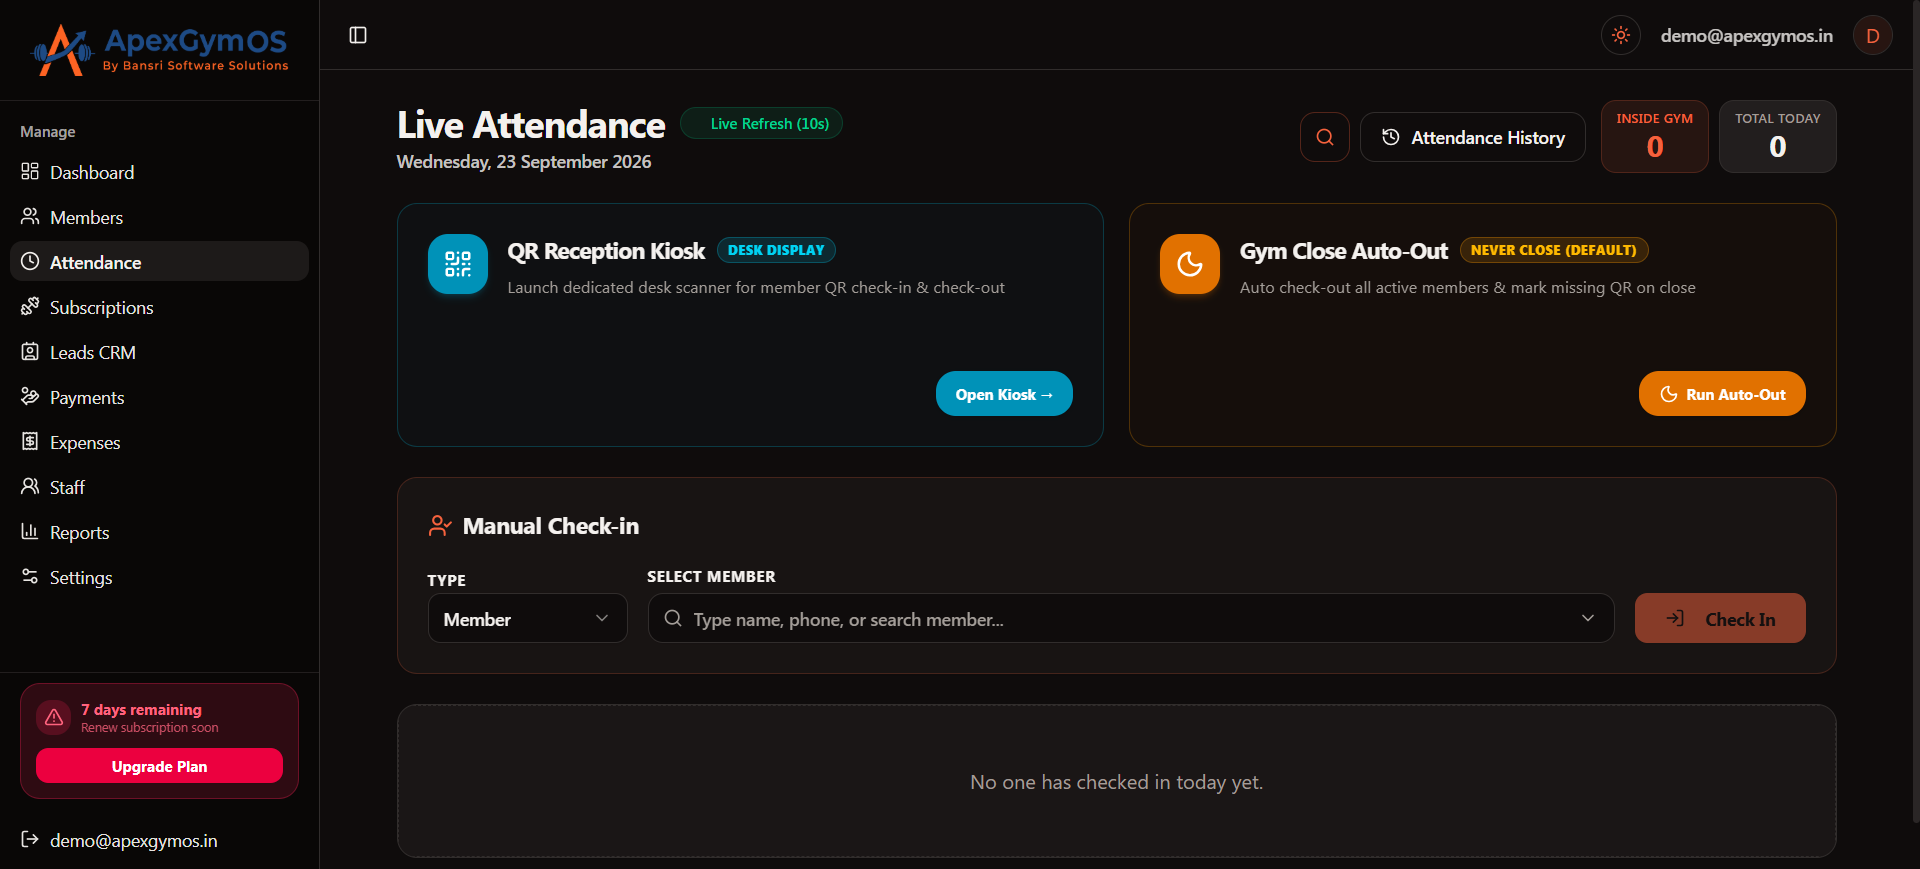
If you are using QR attendance at your reception, configure the appropriate QR setup before allowing members to check in.
For the complete setup guide, see:
Managing Attendance
8. Set Up Payments and Billing
ApexGymOS allows you to record membership payments and generate printable receipts.
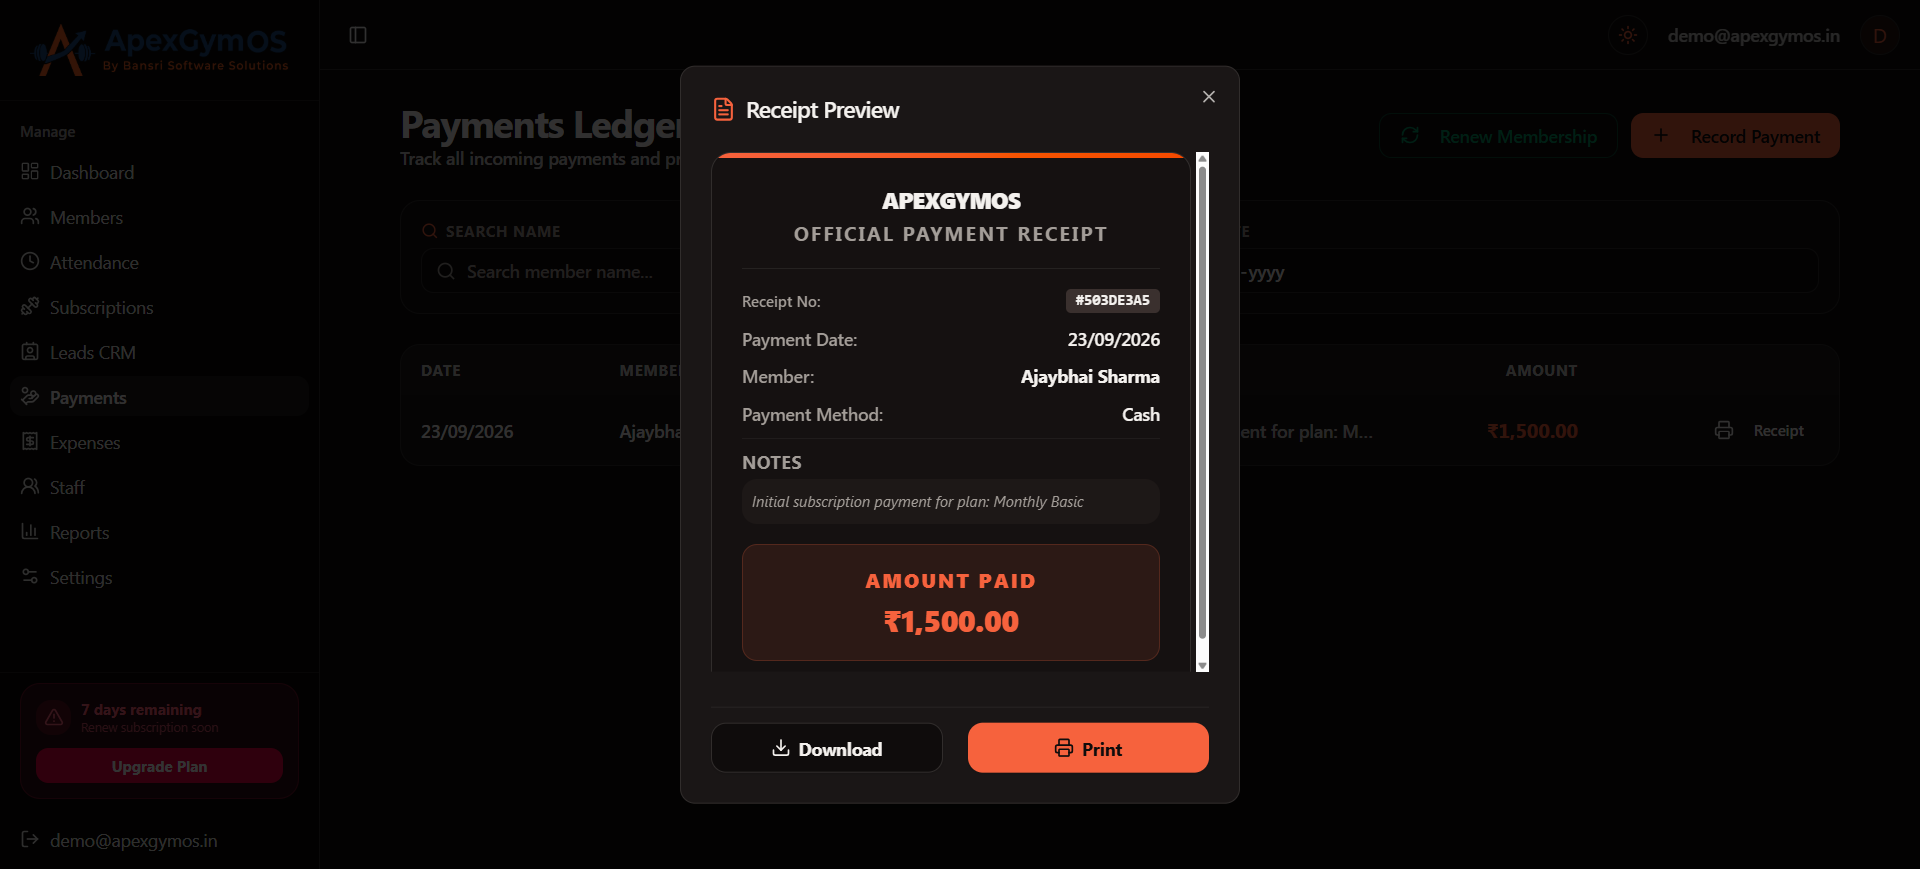
You can record payment information such as the member, amount, payment method, tax, and notes.
For the complete billing workflow, see:
Managing Payments
9. Configure Staff Access
If your gym has multiple employees, create staff user accounts and assign permissions based on their responsibilities.
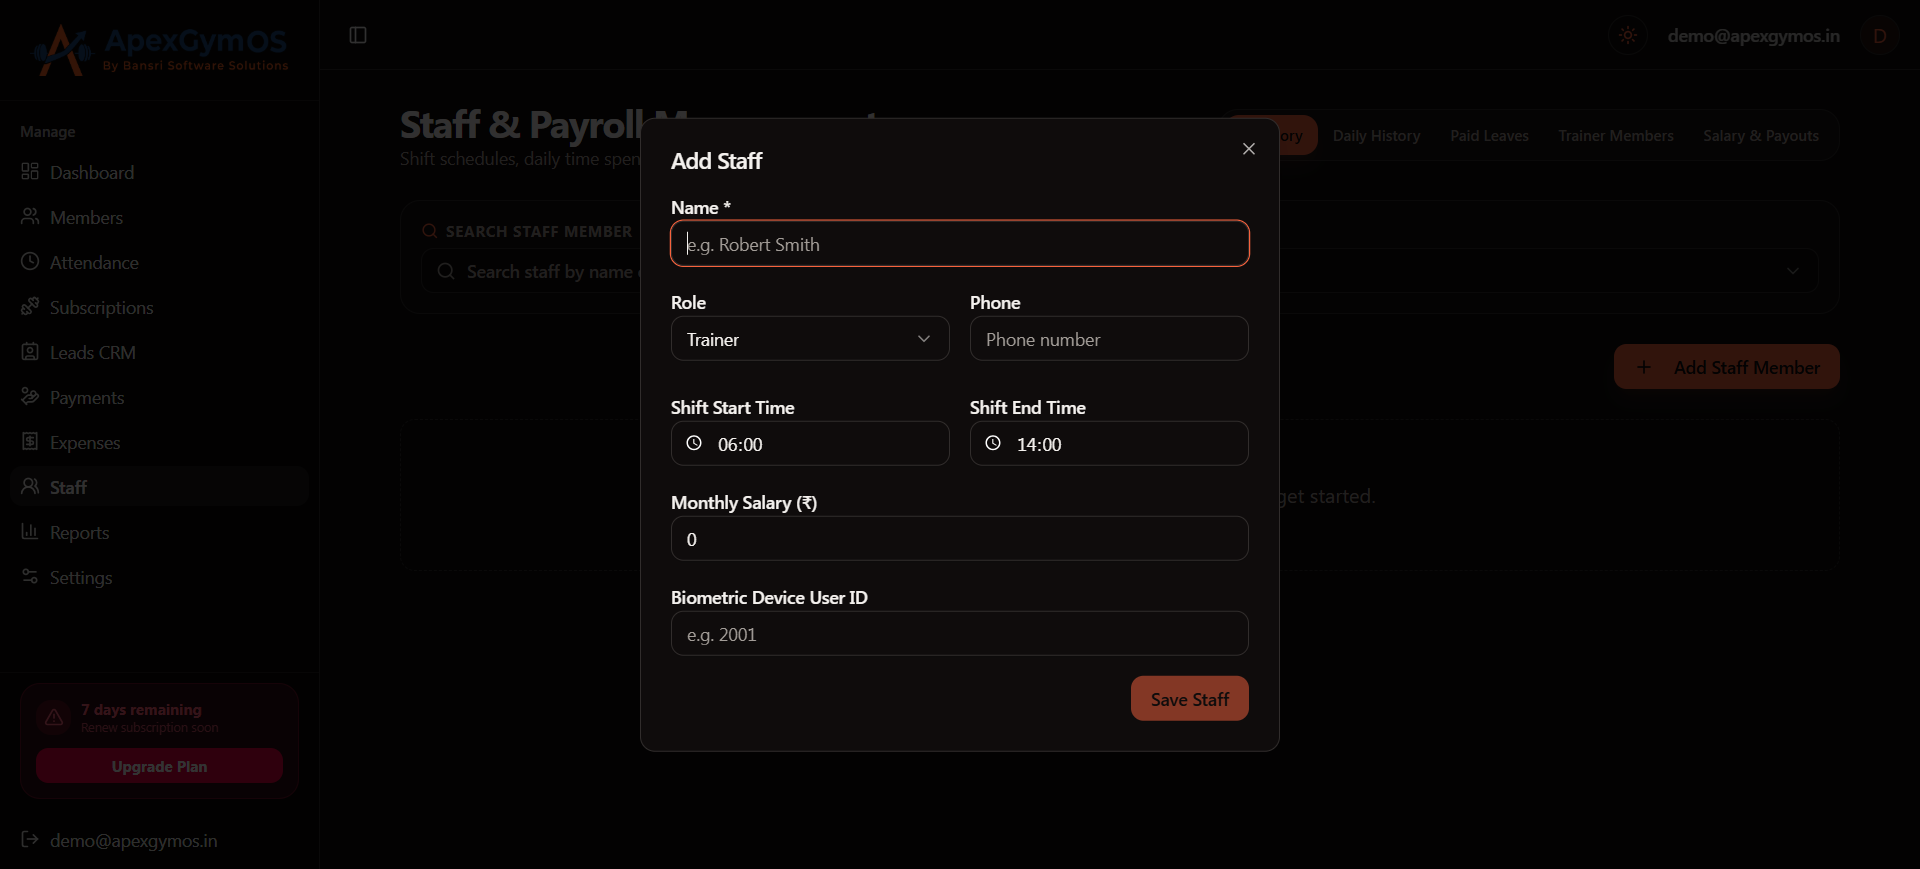
Available role types include:
- Gym Owner / Admin
- Manager
- Front Desk / Receptionist
- Trainer
Each role can have different access to members, attendance, billing, reports, and other system features.
For detailed instructions, see:
Staff Roles & Permissions
Getting Started Checklist
Before moving on, make sure you have:
- Created your ApexGymOS account
- Logged in successfully
- Configured your gym profile
- Created your membership plans
- Added your first member
- Configured your attendance method
- Recorded your first payment
- Created staff accounts if required
Was this guide helpful?
Help us improve ApexGymOS documentation.